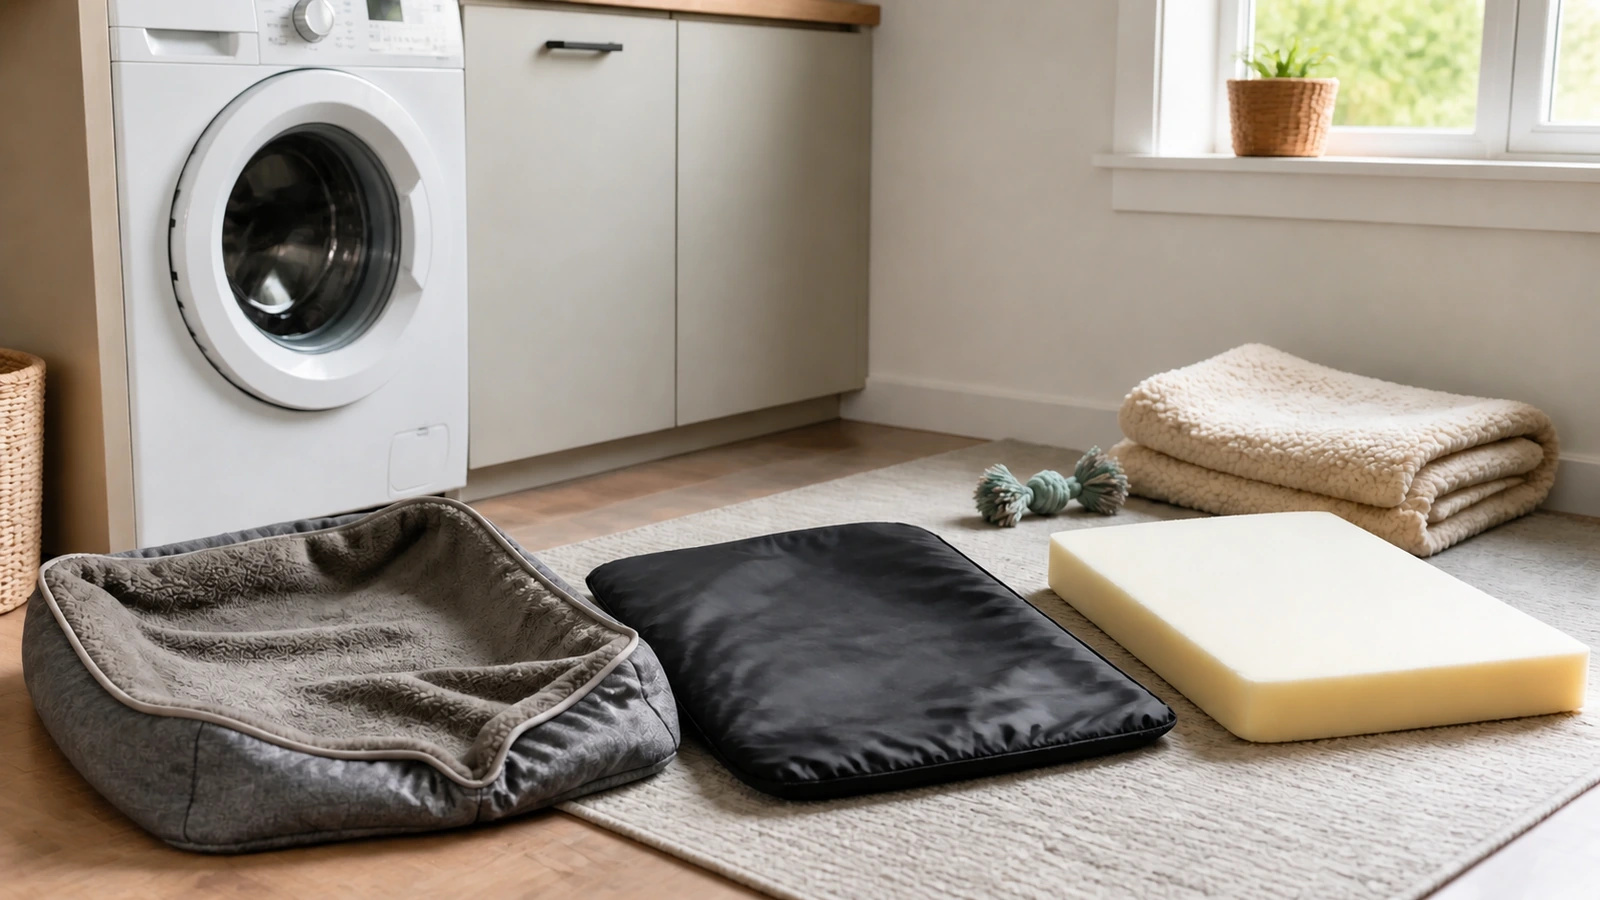
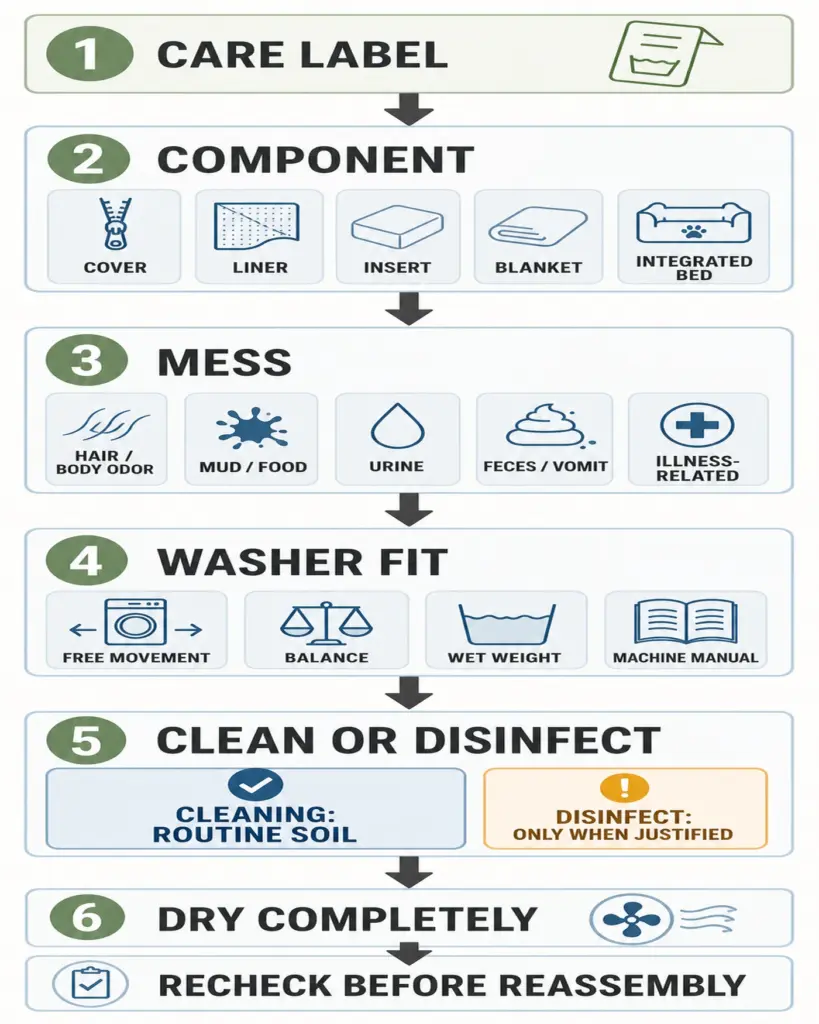
Learning how to wash pet bedding in an apartment is less about finding one perfect cycle and more about making six decisions in the right order: read the care label, identify the component, classify the mess, check washer fit, decide whether cleaning or disinfecting is justified, and recheck the bedding only after it is fully dry.
That order matters. A removable cotton cover, a water-resistant liner, a foam insert, and an integrated bolster bed may all look like one item on the floor, but they can have completely different care limits. The same is true of messes. Loose hair and ordinary body odor do not call for the same response as urine, vomit, or contamination linked to illness.
Apartment constraints add another layer. A compact washer may accept an item that cannot move freely. A thick insert may take too long to dry in a humid room. A shared laundry room may prohibit pet bedding or bulky items. If the bed is your pet’s only sleeping place, you also need a clean temporary resting layer before the wash begins.
The safest practical rule is simple: never let a convenient laundry shortcut overrule the bedding label, the appliance manual, a product label, or a building’s posted rules.
Quick Answer
Start by separating the cover, liner, insert, blankets, and any removable pads. Read the care instructions for each piece rather than assuming the whole bed follows the cover’s label. Remove loose hair and solid debris while everything is dry. Then decide whether the mess needs ordinary cleaning or a more specific contamination response.
Machine-wash only a component that is approved for machine washing and can move freely without creating an unstable or overloaded load. Select detergent, cycle, water temperature, and drying method from the item’s care label and your appliance manual. If those instructions conflict, choose the more restrictive path or contact the manufacturer.
After washing, dry every component completely. Recheck the insert as well as the surface for dampness, odor, residue, distortion, or damaged seams. Do not put a dry cover over a damp insert, and do not return the bed to a closed corner until the entire assembly passes that dry-state check.
Table of Contents
The Pet-Bedding Wash Decision
Use this sequence every time:
CARE LABEL → COMPONENT → MESS → WASHER FIT → CLEAN OR DISINFECT → DRY-STATE RECHECK
| Component | Typical question | First check | Main risk | Wash decision |
|---|---|---|---|---|
| Removable cover | Can it go in the washer? | Cover’s own care label | Shrinkage, coating damage, zipper stress | Machine-wash only if permitted and properly sized for the load |
| Water-resistant liner | Is “water-resistant” the same as washable? | Liner label and coating instructions | Cracking, delamination, trapped moisture | Follow the liner instructions separately from the cover |
| Foam or fill insert | Can it be submerged? | Insert label and manufacturer guidance | Foam breakdown, clumping, extreme wet weight, slow drying | Do not soak or machine-wash unless specifically allowed |
| Loose blanket or throw | Can it join another load? | Textile label, soil type, washer space | Hair transfer, color transfer, poor rinsing | Wash as its label allows without crowding the machine |
| Integrated bed | Does the zipper prove washability? | Whole-bed instructions, not zipper presence | Uneven load, damaged structure, damp core | Use the approved whole-bed method or a non-submersion alternative |
A zipper is only construction hardware. It may provide access for manufacturing, inspection, or limited spot care; it does not automatically make the cover removable or the contents washable. Look for explicit directions such as machine wash, hand wash, spot clean only, do not remove, or do not tumble dry.
Step 1: Read the Care Label
Find every label before adding water or a pretreatment product. Check the outer cover, the underside of the bed, the liner, and the insert. Photograph the instructions if the label is fading or will be hidden after reassembly.
The label should answer as many of these questions as possible:
- Is the piece removable?
- Is machine washing permitted?
- Is hand washing or spot cleaning required?
- Is a specific water temperature or cycle stated?
- Is bleach prohibited?
- Is tumble drying allowed, and under what setting?
- Must the item lie flat or air-dry?
- Are there instructions for reshaping the fill?
Do not convert missing instructions into permission. If a label is absent, search the manufacturer’s page using the exact model or product name. If you cannot identify the product, use a conservative surface-cleaning approach that does not saturate the unknown material, or ask the manufacturer or a professional cleaner what the construction can tolerate.
The washer manual matters too. An appliance’s bulky, bedding, pet-care, or sanitize option applies only under the conditions stated for that model. A cycle name does not prove that a particular bed is suitable for it.
Step 2: Separate the Bedding Into Components
Treating the bed as a system makes the wash easier and prevents an easy-to-clean surface from hiding a difficult-to-dry core.
Removable Cover
Unzip the cover slowly and watch for loose fill near the opening. Close zippers or secure fasteners as directed so they do not snag. Inspect seams, piping, nonslip backing, and coated panels. A torn seam can open further under agitation, while damaged backing may shed into the machine.
If the label allows machine washing, the cover is usually the simplest component to handle. That still does not grant permission to wash the insert the same way.
Water-Resistant Liner
A liner may reduce how quickly liquid reaches the insert, but “water-resistant” does not mean waterproof, machine-washable, or dryer-safe. Heat, aggressive agitation, and incompatible products can damage a coating or seam seal.
Wipe away surface contamination first, then follow the liner’s instructions. Turn pockets and folds so you can see whether liquid reached a seam. A liner that remains tacky, cracked, peeling, or odorous after approved cleaning may no longer be protecting the insert reliably.
Foam or Fill Insert
Foam and loose fill deserve the most caution. Water can make an insert surprisingly heavy, and squeezing, wringing, or tumbling can damage its shape. Dense foam may feel dry on the surface while moisture remains deep inside.
Do not assume hand washing is safe merely because machine washing is not. Full submersion must also be supported by the care instructions. If only spot cleaning is permitted, control the amount of liquid and keep the insert well ventilated until the treated area and interior are dry.
Loose Blanket or Throw
A loose blanket is a separate textile, even if it always sits inside the bed. Check its label, remove dry debris, and consider whether it can move and rinse adequately in the planned load. A small blanket may be washable with compatible textiles; a heavy or highly soiled one may need its own load.
Integrated Non-Removable Bed
For a bed with no truly removable cover, find whole-bed instructions. If machine washing is allowed, check drum movement and wet-load balance before proceeding. If the label permits only spot cleaning, clean the affected zone without soaking the core. If contamination has penetrated a non-washable structure and cannot be removed or dried safely, replacement may be more realistic than repeated wet treatments.
Step 3: Identify the Mess Type
Classify the mess before choosing products or settings. This prevents ordinary soil from receiving an unnecessarily harsh response and keeps higher-risk contamination from being treated like routine odor.
| Mess type | First response | Cleaning boundary | Disinfecting boundary |
|---|---|---|---|
| Hair, dander, ordinary body odor | Remove loose material while dry | Follow routine label-approved washing or surface cleaning | Usually not required solely for ordinary odor or hair |
| Mud, food, light residue | Lift solids; blot or pretreat only as the label permits | Use the approved cleaning method for the component | Consider only if contamination or health guidance gives a reason |
| Urine | Blot fresh liquid; separate affected components; check penetration | Clean the washable component according to its label | May be justified depending on contact, household risk, and approved product directions |
| Feces or vomit | Remove solids carefully; contain dirty textiles; wash hands | Clean first so soil does not block the next step | Use authoritative guidance and a compatible labeled method when disinfection is indicated |
| Illness or parasite-related contamination | Isolate the item and seek condition-specific guidance | Do not improvise a generic routine | Follow veterinary or public-health directions for that condition and the exact product label |
Hair, Dander, and Ordinary Body Odor
Dry removal comes first. Washing a thick layer of loose hair can move it to other textiles and leave more work in the machine. Ordinary body odor usually calls for appropriate cleaning and complete drying, not automatic disinfection.
Mud, Food, and Light Residue
Let wet mud become manageable if that is safe for the material, then lift or vacuum dry particles. Remove food solids without grinding them into the fabric. Use only a pretreatment compatible with the component’s label, and test where the manufacturer recommends testing.
Urine
Blot fresh liquid instead of rubbing it outward. Separate the cover and liner promptly so you can see whether urine reached the insert. Do not keep adding liquid to a foam core that is not approved for saturation. If odor remains after a label-approved wash and complete drying, reassess the penetrated component instead of repeatedly washing the clean outer cover.
Feces or Vomit
Remove solids without shaking the bedding through the apartment. Keep the item away from clean laundry, food-preparation areas, and the pet’s temporary sleeping layer. Cleaning removes visible soil; any subsequent disinfection decision should reflect the contamination, the people and animals in the household, the fabric’s limits, and authoritative instructions.
Illness or Parasite-Related Contamination
Do not treat every parasite or illness with the same laundry formula. Ask the veterinarian what organism or condition is being managed and what must be cleaned, disinfected, isolated, or discarded. Then confirm that the recommended method is compatible with the bedding and appliance. If a medically important method would damage a non-washable insert, replacement can be safer than an improvised chemical treatment.
Step 4: Remove Hair and Dry Debris Before Washing
Work while the surface is dry. Vacuum with an upholstery attachment, use a manufacturer-approved brush, or lift loose material with a suitable dry tool. Empty the tool or vacuum container away from clean bedding.
Keep this step proportional. The goal is to prevent a mat of loose hair and debris from entering the wash, not to reproduce an entire laundry-hair routine. For a deeper pretreatment workflow, see how to remove pet hair from laundry.
If hair appears on every clean textile shortly after washing, the bed may be only one transfer point. The wider movement pattern is covered in this guide to controlling pet hair in an apartment.
Step 5: Check Whether the Bedding Actually Fits the Washer
“It fits through the door” is not a washer-fit test. A safe, effective load also needs room to move, rinse, and remain balanced after absorbing water.
Before loading, check:
- Care-label permission: The exact component is approved for machine washing.
- Drum movement: The item is not wedged tightly against the drum.
- Load balance: The shape and weight can distribute rather than collecting on one side.
- Wet weight: The component will become heavier; foam and dense fill can change dramatically when wet.
- Bulky-item capability: The appliance manual allows this item type and explains how to load it.
- Hardware condition: Zippers, hooks, rigid bases, and exposed foam cannot damage the machine.
- Shared-laundry permission: Posted rules allow pet bedding and the machine is suitable for the load.
| Situation | Washer decision | Drying decision | Better alternative when the check fails |
|---|---|---|---|
| Cover moves freely and label permits washing | Use the label-approved method | Follow its approved dryer or air-dry instructions | Hand wash only if the label permits it |
| Whole bed fills the drum tightly | Do not run the load | Do not assume a large dryer will solve the wash problem | Use an approved larger machine, professional service, or non-machine method |
| Load becomes lopsided before or during washing | Stop according to the appliance manual | Reassess water retention before moving it | Redistribute only if the manual permits; otherwise choose another method |
| Insert is not approved for submersion | Keep it out of the washer | Use the approved spot-clean and ventilation method | Replace if deep contamination cannot be removed safely |
| No dryer is available | Wash only if a complete air-drying path exists | Use airflow, spacing, and turning only as material instructions allow | Delay washing until a safe drying area and temporary bed are ready |
| Shared machine prohibits pet bedding | Do not use it | Do not transport wet bedding without a plan | Follow building options or use a permitted professional facility |
Never invent a capacity threshold from drum volume alone. Appliance design, load type, item shape, and the manufacturer’s loading rules all matter. If the washer begins banging, walking, displaying an imbalance warning, or failing to drain, follow its manual rather than forcing the cycle to continue.
Step 6: Choose Cleaning vs Disinfecting
Cleaning and disinfecting are different jobs. Cleaning uses soap or detergent and physical action to remove dirt and germs. Disinfecting uses a labeled process to kill germs. The CDC notes that cleaning is usually sufficient for most pet items and treats disinfection as an additional step for particular situations.
Routine hair, dander, and ordinary odor do not automatically justify disinfecting. A stronger response may be appropriate after urine or feces contact, during illness, when a veterinarian provides condition-specific directions, or when someone in the household has a higher risk from germs. Even then, the decision is not complete until the method is compatible with the textile and its label.
Do not pour bleach, sanitizer, vinegar, essential oil, or another household product into the load simply because it appears in a general cleaning tip. A disinfectant must be suitable for the intended use, used exactly as its label directs, and kept away from pets during use. Never mix cleaning or disinfecting products. If the required contact time, rinse, temperature, or drying step cannot be achieved on that bedding, the process may not provide the intended disinfection.
When illness or parasites are involved, use condition-specific CDC or veterinary guidance. “Disinfected” should describe a verified method, not a stronger-smelling load.
Step 7: Wash According to the Approved Method
Once all six decisions point to washing, prepare the load without adding assumptions. This is the practical difference between knowing how to wash pet bedding and simply choosing a familiar cycle:
- Remove the approved component from the rest of the bed.
- Check seams and close or secure fasteners as directed.
- Remove loose hair, solids, and dry debris.
- Pretreat only with a product and method permitted for that material.
- Load the item so it can move and the washer can remain balanced.
- Measure the detergent according to its label and the machine instructions.
- Select the cycle and water temperature stated by the care label, resolving any appliance limitation before starting.
- Complete any rinse or disinfection step only when its governing instructions require it.
- Remove the item promptly so the drying plan can begin.
There is no universal “pet bedding” temperature or cycle. Hot water can damage some fabrics, coatings, foam, adhesives, nonslip bases, or elastic. Cold water is not automatically right either. The care label and the actual contamination determine the method.
Avoid crowding the load with unrelated laundry. Compatible small textiles may sometimes share a wash, but a bulky cover or blanket may need the available drum space to rinse properly. Keep heavily contaminated pieces separate from clean household textiles during sorting and transport.
Step 8: Dry the Bedding Completely
Drying is part of cleaning, not an optional final touch. A cover can feel dry while a seam, bolster, liner fold, or foam core remains damp.
Use the approved dryer setting only if the care label permits tumble drying and the item can move safely in that dryer. Otherwise, air-dry according to the manufacturer’s instructions. Do not substitute a hair dryer, space heater, radiator, or direct high heat for an approved method. Concentrated heat can damage fabric, coatings, adhesives, or foam and may create a fire risk.
The finish line is a sequence:
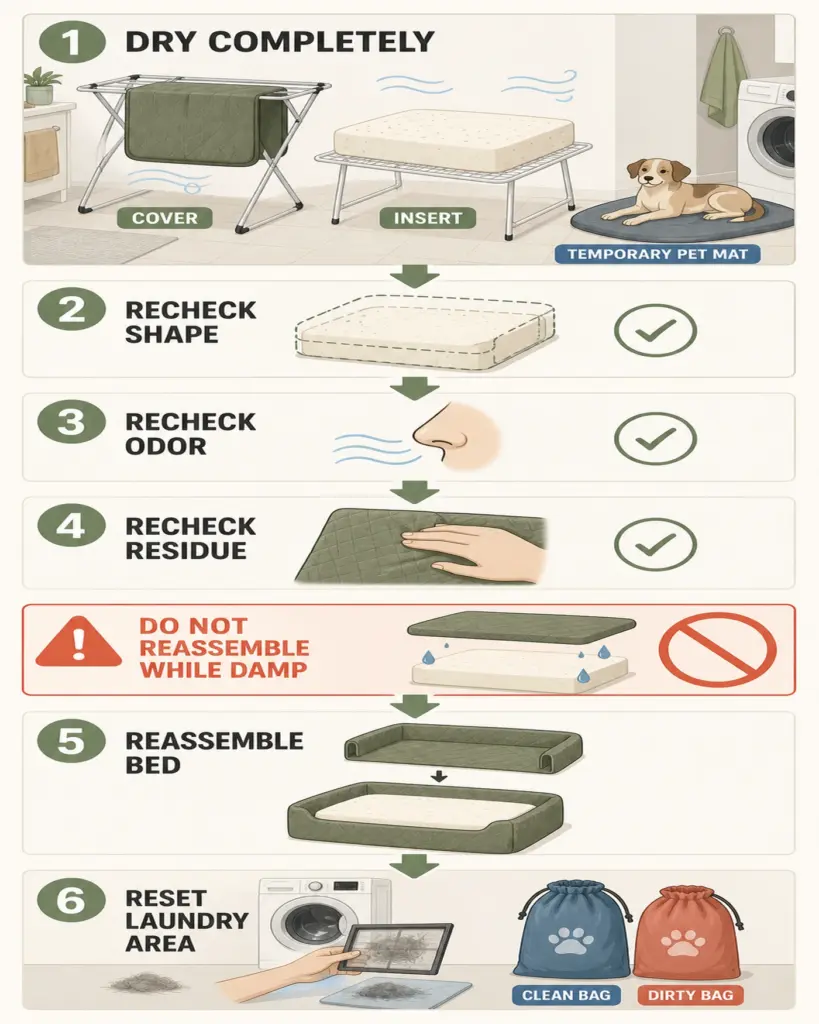
DRY COMPLETELY → RECHECK SHAPE → RECHECK ODOR → RECHECK RESIDUE → REASSEMBLE
Press thick areas with a clean, dry hand and compare multiple sides. Inspect seams and folds. Check whether fill has clumped, foam has distorted, or the liner has become tacky. Smell the item only after it cools and dries; warmth or detergent fragrance can temporarily mask a remaining source.
Do not install a dry cover over a damp insert. That traps moisture inside the assembled bed and makes the next odor problem harder to locate.
How to Dry a Pet Bed in a Small Apartment
Plan the drying zone before the wash starts. In a small apartment, the best available location may be a bathroom with an exhaust fan, a laundry alcove with safe airflow, or a rack positioned where every side of the item can breathe. Keep exits, heaters, cooking areas, and electrical equipment clear.
For air-drying:
- Support the component so wet weight does not stretch one seam.
- Expose as much surface area as the care instructions allow.
- Turn or reshape the item only when permitted.
- Use normal room airflow or ventilation rather than concentrated heat.
- Keep damp bedding out of a closed closet and away from clean textile storage.
- Protect the floor beneath it without sealing the underside against a non-breathable surface.
- Allow extra time in humid weather, but do not promise completion after a fixed number of hours.
If the apartment has no safe place to dry a thick insert completely, do not saturate it merely because washing is possible. Washing and drying are one decision. A safe start requires a credible finish.
What If the Insert Cannot Go in the Washer?
First determine what the manufacturer does allow: vacuuming, removable-cover washing, surface wiping, spot cleaning, professional cleaning, or replacement. Stay within that method.
For approved spot cleaning, limit moisture to the affected area, use the specified product, remove residue as directed, and ventilate both sides. Do not force water through foam to chase an odor if the insert is not approved for saturation. Deep urine, vomit, or fecal contamination in a non-washable core may not be recoverable in an apartment without controlled extraction and drying.
Replacement is a practical hygiene decision when the source cannot be reached, the core will not dry, the material is breaking down, or required decontamination is incompatible with the item. A fresh cover cannot correct contamination sealed beneath it.
Shared-Laundry Rules for Pet Bedding
Posted building or laundromat rules control. Some facilities allow washable covers but prohibit whole pet beds, heavily soiled items, or oversized loads. Others may direct residents to particular machines. Check before transporting the bedding; do not assume that paying for a cycle grants permission for every item.
When the facility allows the load:
- Remove loose hair and dry debris at home.
- Contain dirty bedding in a washable bag or other suitable carrier.
- Keep clean and dirty components separated.
- Do not overload the shared washer or dryer.
- Follow posted machine settings and item restrictions.
- Remove visible hair or residue after use where the rules direct.
- Take the item home in a clean carrier only after the appropriate wash stage.
If the bed is contaminated with feces, vomit, or material linked to illness, ask whether the facility accepts it and follow the relevant health guidance. A shared machine is not the place to improvise a disinfection process that requires an unverified setting or chemical.
How to Handle Urine, Vomit, or Feces Without Over-Washing
Start by locating how far the mess traveled. A urine spot on a removable cover may also have crossed a liner seam. Vomit can leave solids on the surface but liquid in the piping. Fecal contamination may be confined to one blanket or may reach the integrated base.
Separate the affected pieces, lift solids, blot liquid, and follow each component’s instructions. Cleaning the cover three times will not fix a contaminated insert. Conversely, discarding an entire bed may be unnecessary when an effective liner protected a washable cover and the insert remains clean and dry.
Use the least aggressive method that fully addresses the actual contamination and any justified health requirement. Escalate because evidence calls for it, not because the item belongs to a pet.
What If the Bedding Still Smells After Drying?
Wait until the item is fully dry, then identify where the odor is strongest. Check seams, the underside, zipper tape, liner folds, foam, nearby flooring, and the wall-facing side of the bed. Residual detergent can also create an unpleasant smell or skin-contact concern, so inspect for stiffness, slickness, or visible residue.
If only one approved washable component smells, repeat only the label-supported response for that piece. If the odor returns immediately from a non-washable core, repeated cover washing is unlikely to solve it. If the whole room smells or you cannot confirm the bedding as the source, use a broader apartment pet-odor source check rather than adding more fragrance to the bed.
Persistent odor paired with dampness, visible material breakdown, or contamination that cannot be reached is a stop signal. Replace the affected component or seek professional advice instead of layering unverified products.
What to Do While the Pet Bed Is Drying
Prepare a temporary sleep surface before removing the only bed. Use a clean, washable blanket or mat that suits your pet’s mobility and normal resting needs. Place it in a familiar, dry location away from the laundry zone and cleaning products.
Keep the temporary layer simple so it can be cleaned if the drying period extends. Do not give the pet access to a damp insert, loose fill, exposed zipper, or wet treated area. For an older pet or one with orthopedic needs, preserve the support arrangement recommended by the veterinarian rather than substituting a thin surface without considering comfort and access.
Once the permanent bed is dry and reassembled, launder or store the temporary textile according to its own care label. If you want bedding care to fit a broader routine, use a weekly apartment cleaning schedule for pet homes for timing while keeping the actual wash method label-dependent.
Reset the Washer, Dryer, and Laundry Area
After the load, inspect the equipment according to its manual. Remove visible hair or debris from accessible areas. Check and clean the dryer lint screen as directed for every load, and service any washer pet-hair filter, drain filter, gasket, or dispenser only at the interval and by the method specified for that model.
Do not open panels or reach into inaccessible parts. Do not run an empty “cleaning” cycle with a chemical unless the washer manual instructs you to do so. If visible contamination remains in shared equipment, follow the facility’s posted process or contact management.
Clean transport containers and the drying surface if they became soiled. Let cleaning tools dry before storage. Store the clean cover, spare blanket, and dirty-laundry bag separately so the next change does not transfer hair or residue back onto finished bedding.
Common Pet-Bedding Laundry Mistakes
- Washing the whole bed because the cover has a zipper. Confirm what the zipper is for and read separate component labels.
- Using one cycle for every mess. Ordinary odor, mud, urine, feces, and illness-related contamination require different decisions.
- Judging washer fit by the door opening. The item also needs free movement, balance, acceptable wet weight, and manual approval.
- Assuming hand washing is always gentler. Full submersion can still damage foam, coatings, adhesives, or fill.
- Adding unverified deodorizers or disinfectants. Product compatibility, purpose, contact time, rinse directions, and pet access all matter.
- Covering a damp insert. Reassembly can trap moisture where you cannot monitor it.
- Starting without a drying zone. A washable item is not apartment-compatible if it cannot dry completely in the available space.
- Ignoring shared-laundry restrictions. Posted rules determine what can enter the machines.
- Repeating cover washes when the core is the source. Recheck each component after drying.
- Using direct heat to hurry the process. Follow the care label instead of improvising with a heater or hair dryer.
When to Stop DIY
Stop and seek manufacturer, appliance, veterinary, or professional-cleaning guidance when:
- the care label is missing and the material cannot be identified;
- the insert contains deep contamination but is not approved for washing or saturation;
- the bedding requires a method your washer or dryer manual does not support;
- the load becomes unbalanced, unusually heavy, or fails to drain;
- foam crumbles, fill escapes, coatings peel, or seams open;
- the item remains damp or smells after a complete approved process;
- illness or parasites require condition-specific decontamination;
- a person or animal in the household has a higher health risk;
- the shared facility does not permit the item;
- you cannot create a safe drying and temporary-sleeping setup.
The goal is not to save every bed at any cost. It is to return a clean, fully dry, structurally sound resting place without damaging the bedding, appliance, apartment, or shared facility.
Final Takeaway
The reliable answer to how to wash pet bedding is to make decisions in order: care label, component, mess, washer fit, cleaning or disinfecting, and dry-state recheck. Separate what can be separated, remove dry debris before washing, and let labels—not generic pet-laundry rules—control products, cycles, temperatures, and drying.
In an apartment, plan the machine, drying area, shared-laundry permissions, and temporary pet bed before the item gets wet. Then finish only when every component is completely dry, correctly shaped, free of problematic residue, and ready to reassemble.