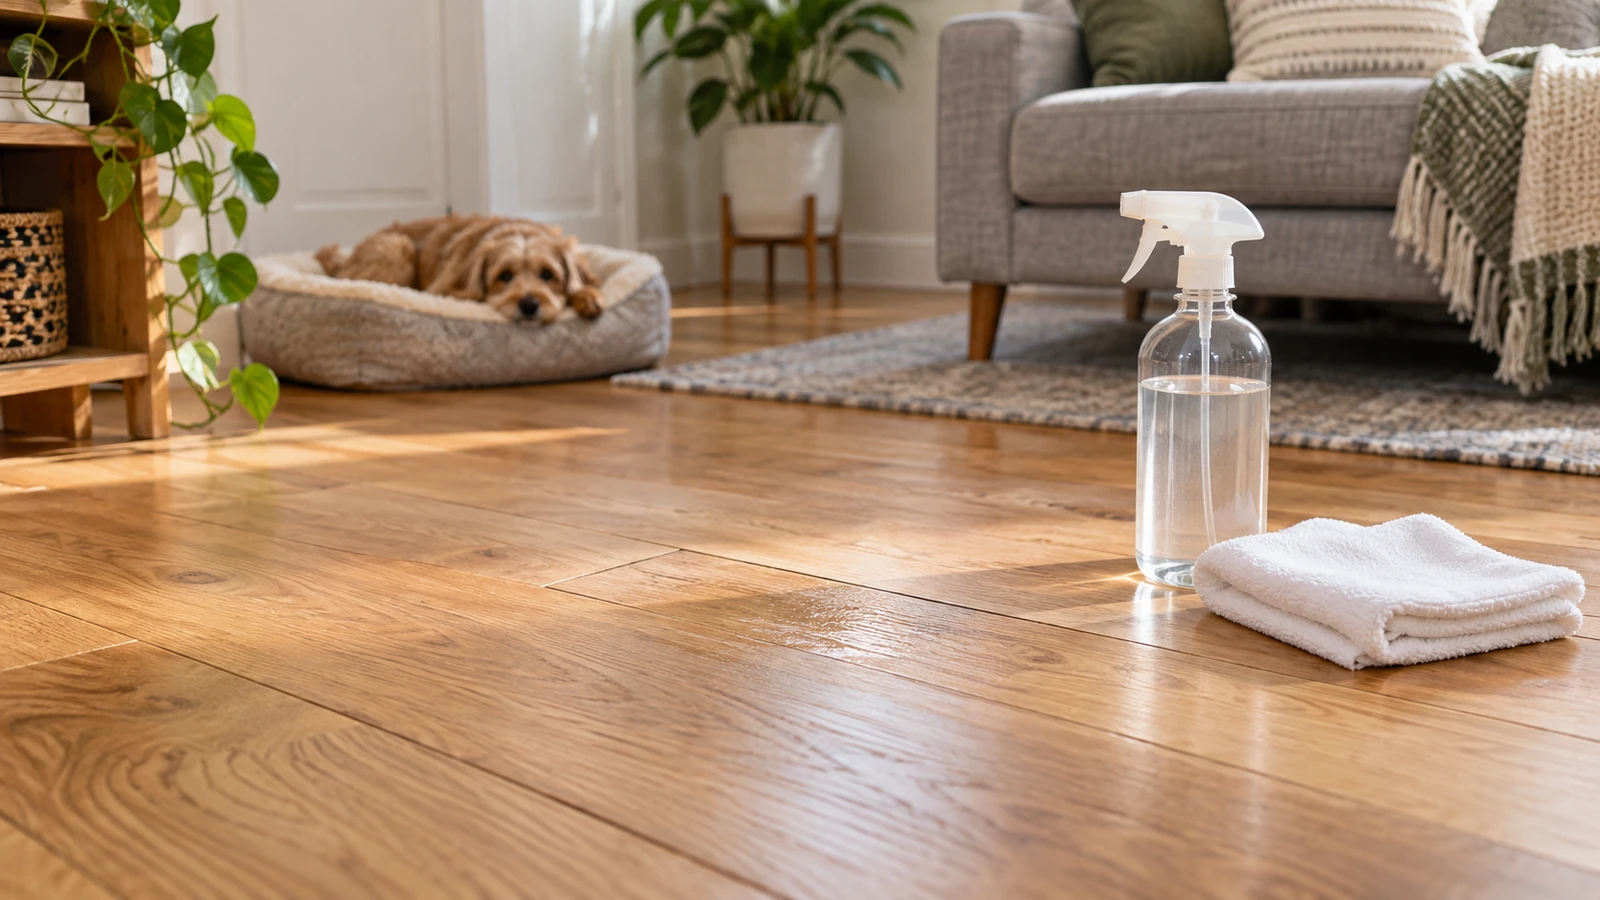
To learn how to get pet urine smell out of hardwood floors, start by limiting moisture and finding out what kind of wood floor and finish you have. Blot a fresh accident immediately, inspect the finish and seams, then use one cleaner that both the flooring manufacturer and the cleaner label allow on that exact surface. Apply it to a cloth or mop pad rather than pouring it onto the floor, and dry the area promptly.
An older odor needs a different decision. If the smell remains after the surface is dry, the urine may have reached a worn finish, a plank joint, an exposed edge, or wood below the finish. Repeatedly soaking the top cannot reliably reach those layers and may add moisture damage. A renter should document the area and contact the property manager; an owner may need a wood-floor professional to assess repair, board replacement, or refinishing.
This guide is for real hardwood and engineered wood with a real wood wear layer. Wood-look laminate, luxury vinyl plank, and sheet vinyl can resemble hardwood but have different construction and care rules. If you cannot identify the floor, pause before applying a pet-odor product.
Quick Answer
Use this order:
- Keep people and pets out of the wet area.
- Blot fresh urine with a clean absorbent cloth. Do not scrub it across more boards.
- Check the floor type, finish condition, seams, edges, and any prior products.
- Follow the flooring maker’s care instructions. Use the least liquid they permit.
- If a urine-specific cleaner is needed, use it only when its label includes your finished wood surface and the flooring guidance permits it.
- Spot-test in a hidden place, apply to a cloth or pad, and keep liquid out of joints.
- Remove residue only as directed, dry the floor promptly, and let it reach a normal dry state.
- Reassess the odor, color, sheen, texture, and board shape before repeating anything.
Do not mix cleaners. Do not assume vinegar, peroxide, bleach, baking soda, steam, or an enzyme product is safe for every wood finish. Do not sand a localized spot as a first cleaning step.
Table of Contents
First Identify the Floor and Its Condition
“Hardwood” is often used for several floors that look similar. Real wood flooring includes solid wood and engineered products with real wood as the top wearable surface. Laminate and vinyl plank are different materials even when the printed pattern looks like oak.
That distinction changes what moisture can do, what cleaner is allowed, and whether refinishing is possible. A solid wood floor may tolerate professional sanding more than a thin engineered wear layer. A factory finish may have different approved products from a site-finished oil, wax, or polyurethane system. A water-resistant collection may also carry conditions and time limits that do not apply to ordinary wood flooring.
Look for a product name in closing documents, spare planks, maintenance records, a lease packet, or the flooring installer’s paperwork. Ask the owner or property manager if the floor is not yours. Do not identify the finish by color or shine alone; several finish systems can look similar.
Then inspect the affected area in good light. Check the center of the spot, every plank joint it crossed, the nearest wall or threshold, and the underside of any mat. Note dullness, whitening, darkening, tackiness, raised edges, cupping, gaps, swelling, cracked finish, or exposed raw wood.
| What you find | Likely cleaning boundary | Safest next move | Reason to stop |
|---|---|---|---|
| Fresh liquid on an intact, known finish | Surface cleanup may still be possible | Blot immediately, then follow the floor maker’s approved spot-cleaning method | Liquid has entered joints, the finish changes, or the product is unknown |
| Dry odor with no visible finish change | The source may be on the surface, in a seam, or nearby | Map the smallest odor zone and review prior products before one compatible treatment | Odor persists at full dry state after a correct attempt |
| Dull, pale, sticky, or softened finish | The finish may have been altered by urine or a cleaner | Stop adding products and ask the manufacturer or a floor professional | Rubbing transfers color or finish to the cloth |
| Dark mark or odor at a plank joint | Liquid may have moved below the surface coating | Document the joint and limit further moisture | Board edge rises, gap changes, or odor returns from the same joint |
| Bare, worn, or unfinished wood | Porous wood can absorb liquid below the cleaning surface | Protect the area and seek material-specific advice | DIY treatment would require saturation, sanding, bleaching, or finish repair |
| Engineered wood with unknown wear-layer thickness | Repair options depend on construction | Find the product specification before considering abrasion or refinishing | Wear layer is unknown or already damaged |
The point is not to diagnose the entire floor from one mark. It is to decide whether ordinary surface cleaning remains a reasonable next step.
Fresh Pet Urine on Hardwood: Act Without Flooding
A fresh accident gives you the best chance to keep liquid at the surface. Speed matters, but force does not.
Remove nearby rugs, bowls, toys, and cords without dragging them through the liquid. Keep the pet out of the work zone. If you need gloves or ventilation, follow the cleaner label. If a chemical product is already present, identify it before adding anything else.
Place a dry white or colorfast absorbent cloth over the center of the puddle and press. Replace it as it becomes wet. Work toward the edges without wiping the urine across additional seams. For a narrow joint, press a folded cloth at the surface; do not drive a tool, swab, or liquid into the gap.
Once free liquid is gone, use the spot-cleaning method specified for the floor. The National Wood Flooring Association recommends cleaning common spills with a soft cloth and a small amount of pH-balanced wood-floor cleaner. Bruce and Shaw likewise advise prompt spill removal and products intended for hardwood, while warning against wet or steam mopping.
These are maintenance principles, not permission to improvise a urine chemistry. If the floor maker names an approved spray cleaner, apply the smallest directed amount to a cloth or microfiber pad unless its instructions say otherwise. Wipe the defined area, attend to the surface of the joint without filling it, and dry excess immediately.
Do not pour cleaner onto the spot to “reach as deep as the urine.” More liquid can carry residue into seams and make the dry-state result harder to judge.
How to Get Pet Urine Smell Out of Hardwood Floors: The Safe Sequence
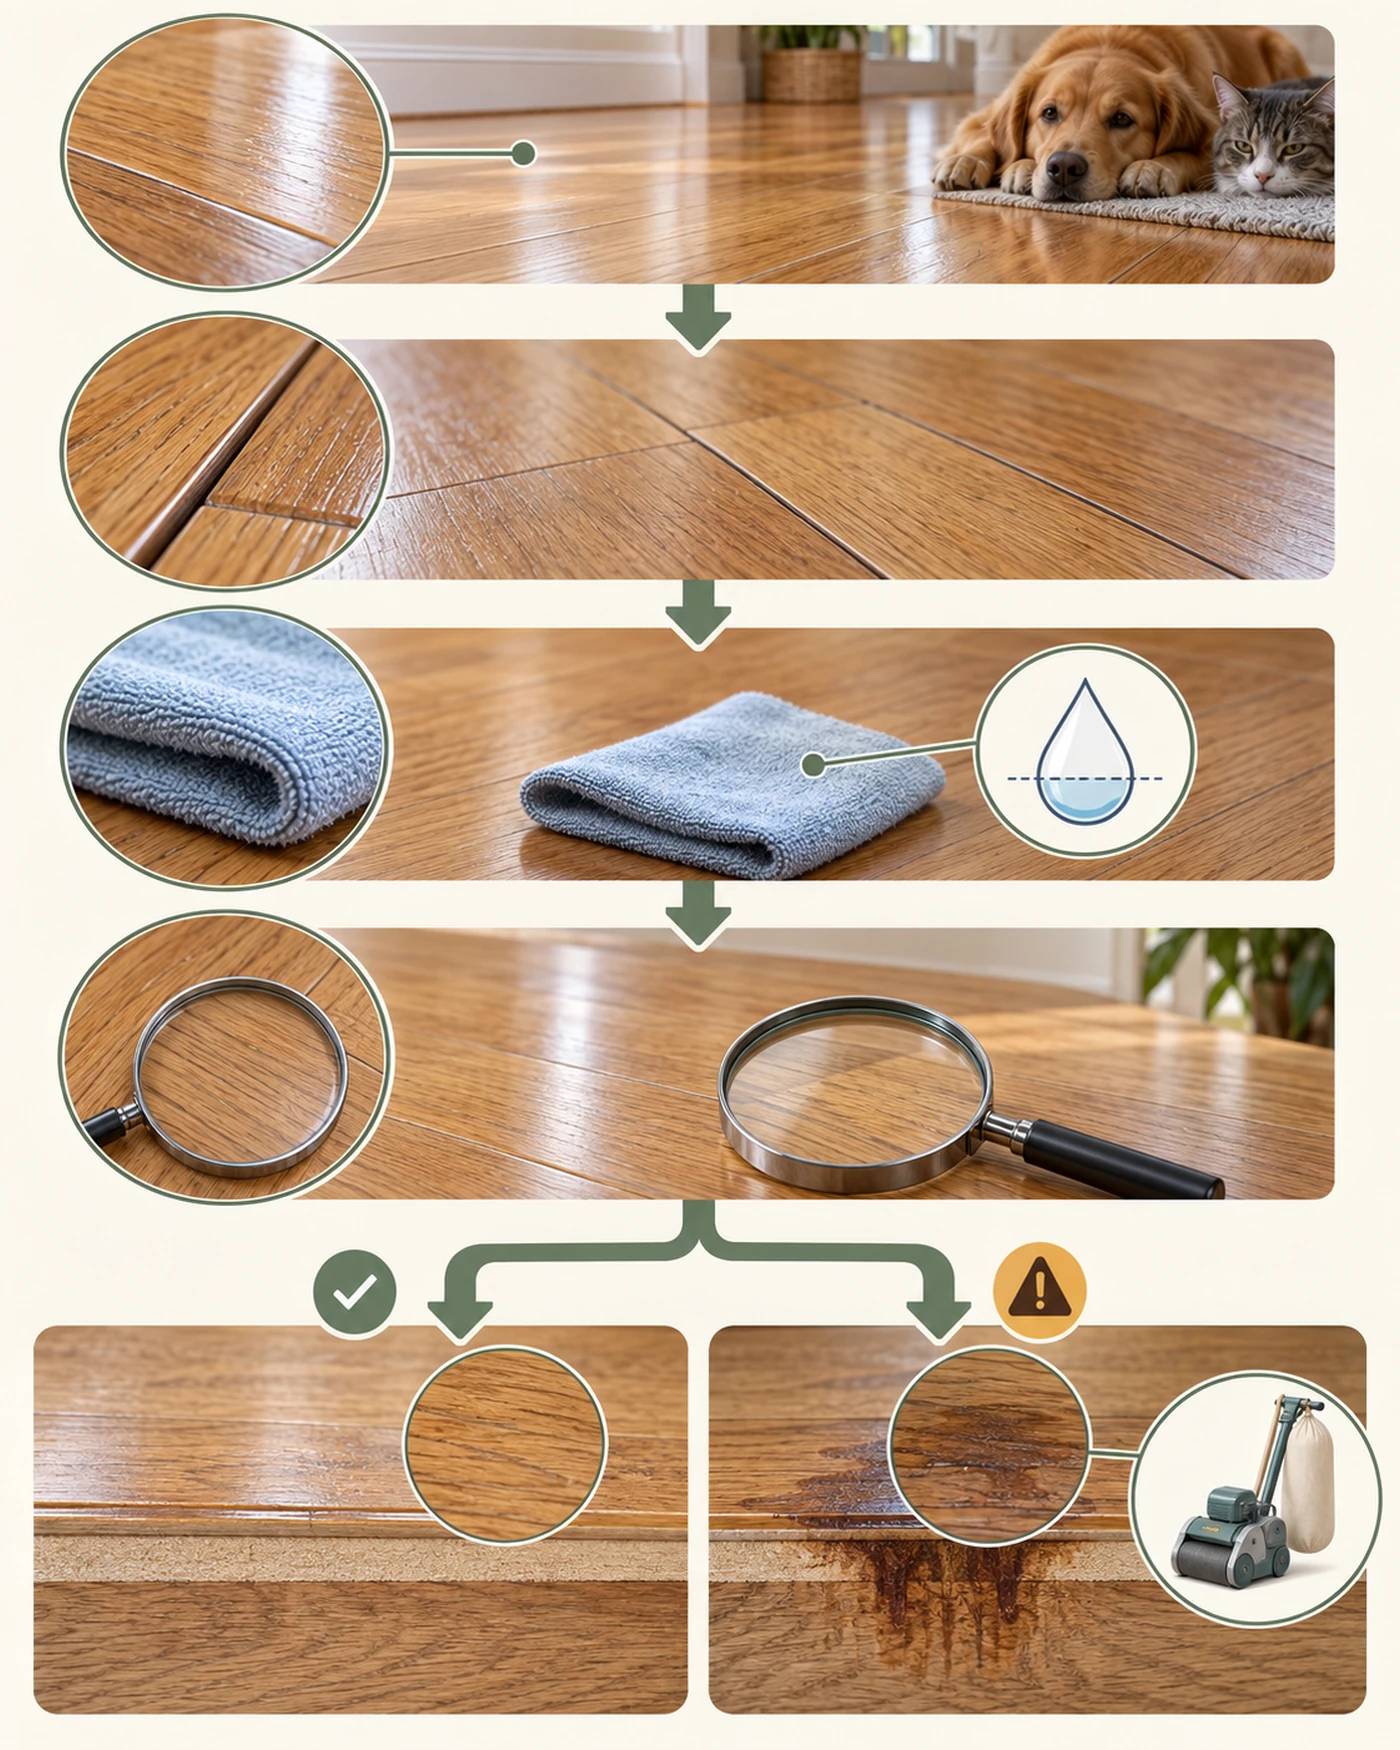
1. Establish what has already touched the floor
Write down every cleaner, powder, disinfectant, or home remedy already used. Note whether the floor is still damp and whether there were fumes, color changes, or a sticky film.
If bleach, ammonia, an acid such as vinegar, peroxide, a disinfectant, or an unknown product may still be present, do not add another cleaner. CDC advises against mixing cleaning or disinfecting products. Ventilate as the product instructions allow and use poison-control or emergency guidance if strong fumes or irritation occur.
2. Find the smallest credible source zone
Odor in a compact apartment can seem larger than its source. Close trash, move a washable mat, remove a damp towel, and compare the floor at normal room conditions. Smell near the center, seams, wall edge, transition strip, and furniture foot without putting your face against the surface.
Mark the area with painter’s tape outside the suspected zone. This prevents each attempt from expanding across the room. If the odor is strongest in a mat, baseboard gap, or nearby textile, clean that item by its own instructions rather than wetting the floor again.
3. Verify the floor and finish instructions
Use the exact flooring care guide when possible. “Safe for hard surfaces” is not the same as “approved for this hardwood finish.” Likewise, a flooring warranty that mentions pet stains may require a specific method, time window, or cleaner.
If the product cannot be identified, ask the manufacturer, installer, landlord, or property manager. On landlord-owned flooring, document the stain and proposed product before taking a step that could change the finish.
4. Choose one compatible product
The safest default is the floor manufacturer’s approved wood-floor cleaner for surface residue. A pet urine or enzyme cleaner becomes an option only when two conditions are met:
- its current label explicitly permits the exact finished wood surface
- the flooring care instructions do not prohibit that product or method
“Enzymatic,” “natural,” “multi-surface,” and “pet-safe” do not answer the floor-compatibility question. Some pet-odor labels exclude untreated hardwood or require a colorfastness test. A product can be useful on carpet and still be wrong for wood.
If you need help comparing the role of a urine-treatment product with a cleaning machine, use the guide to enzyme cleaner versus carpet cleaner for pet urine. Its carpet-focused choices do not override hardwood instructions.
5. Test where a change will not be conspicuous
Follow the label’s hidden-area test. Use the same finish, not a different floor in another room. Apply the directed amount and wait through the specified contact and drying period.
Look from several angles. Stop if the test changes sheen, color, texture, slipperiness, or adhesion. A test does not prove that unlimited product is safe; it only reduces uncertainty for the directed use.
6. Apply with moisture control
Work from a clean cloth, disposable pad, or manufacturer-approved microfiber tool. Avoid spraying into seams. Do not use a string mop, saturated towel, steam mop, or puddle.
If the product requires a dwell time, the label and floor instructions must both allow the surface to remain wet for that time. If they conflict, the method is not a safe fit. Do not keep rewetting wood to satisfy a dwell time written for carpet or another porous material.
7. Finish the label-directed cleanup
Some products are wipe-and-dry; others require residue removal. Follow the exact direction. Do not rinse merely out of habit, and do not leave a film because you assume it will continue working.
Use clean absorbent cloths and dry the surface promptly. Air movement in the room can help normal evaporation, but avoid concentrated heat that may stress a finish or board. Keep pets away until the product label and floor instructions say the area is ready.
8. Reassess only after the normal dry condition
Do not decide that the treatment failed while the product is wet or heavily scented. Recheck when the surface and nearby materials have reached the instructed dry state and the room has returned to normal use.
Compare odor, finish sheen, color, texture, and board profile with an unaffected area. If the odor is gone and the finish is unchanged, stop. More treatment does not create a better result.
If the odor remains at the same seam or mark, move to depth diagnosis instead of repeating the same wet process.
Why the Smell Can Remain After the Surface Looks Clean
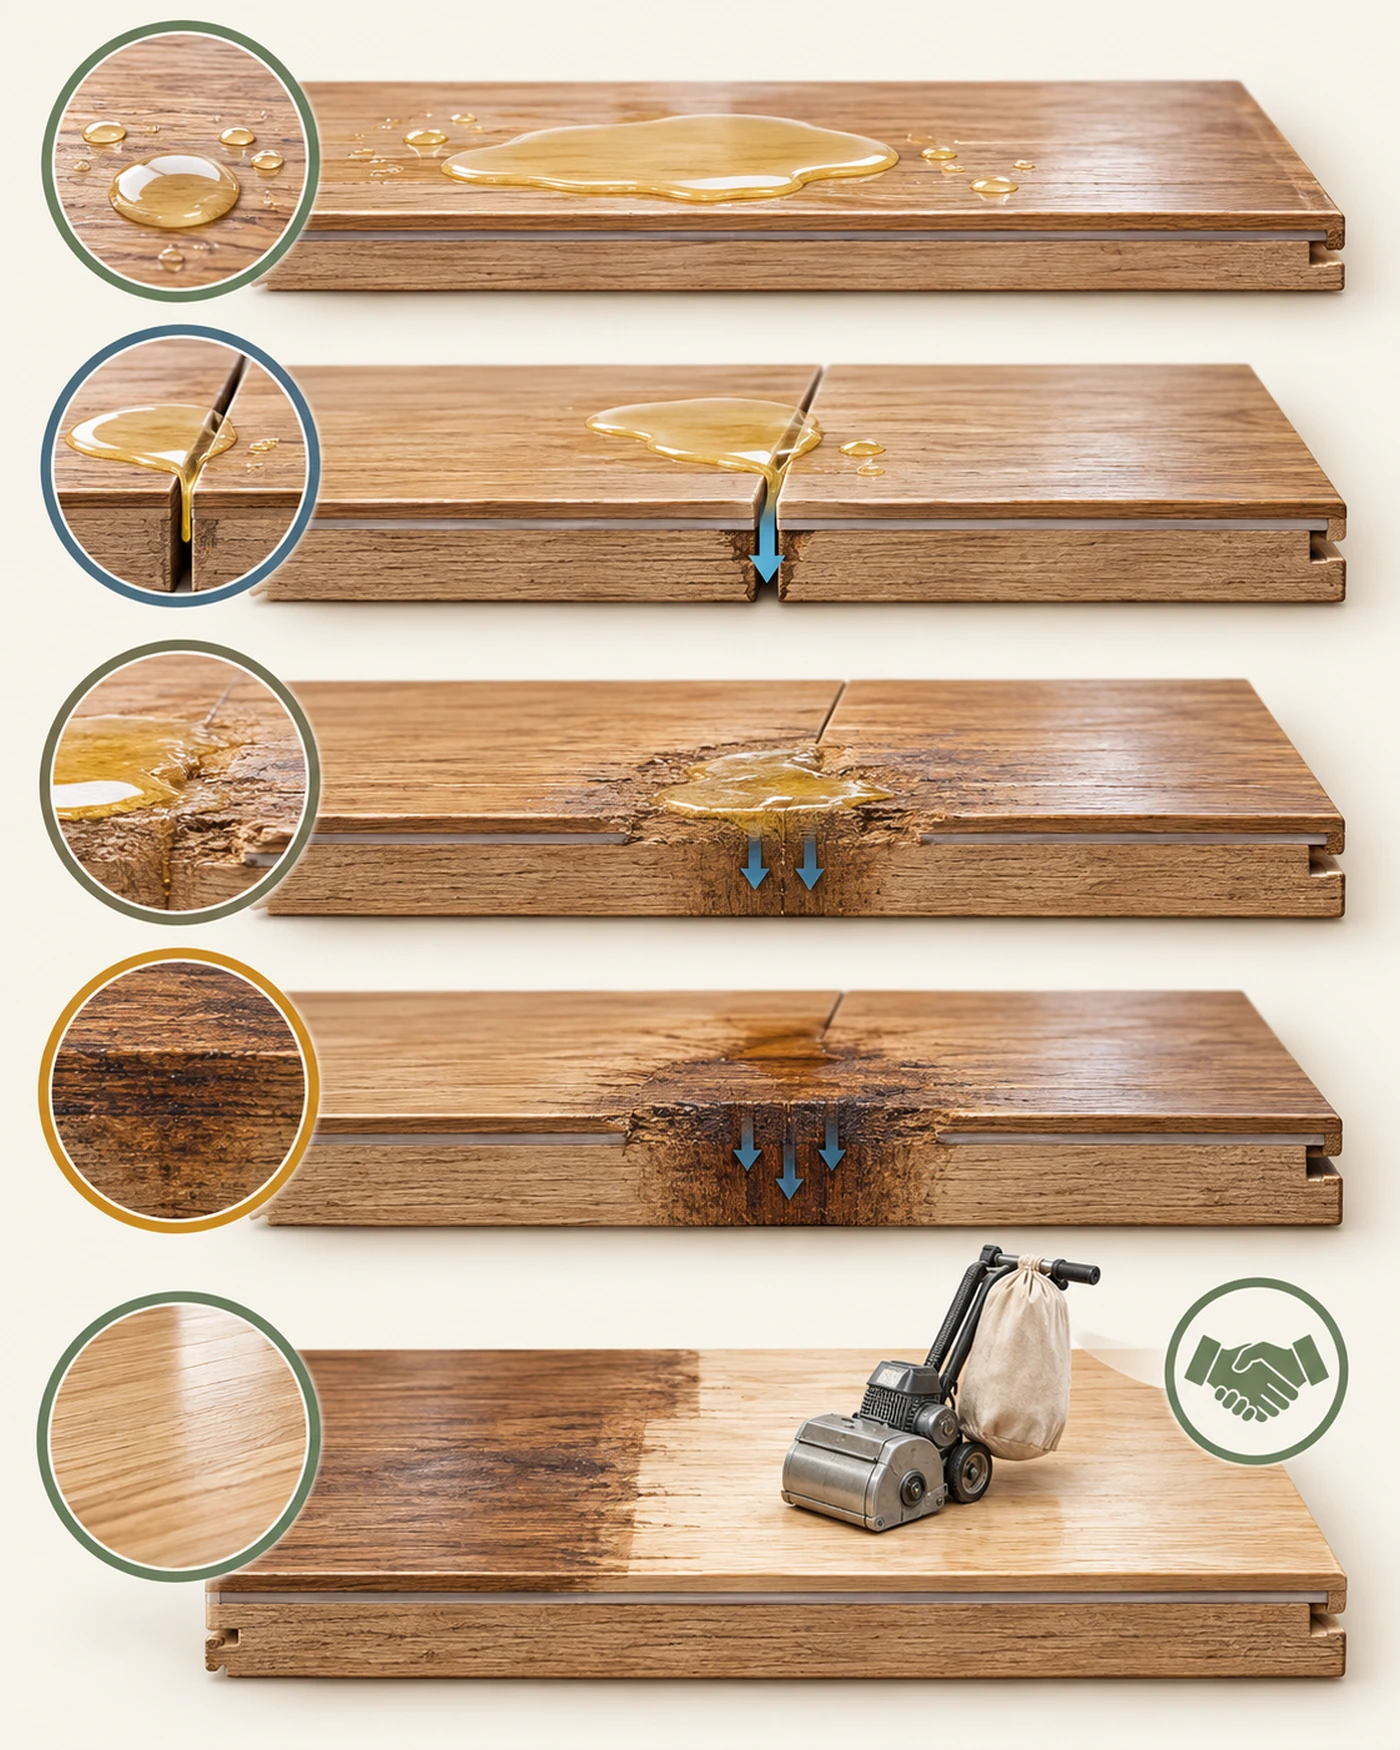
An intact surface finish is a barrier, but it is not a sealed bathtub. Joints, worn traffic paths, scratches, board ends, heating vents, transitions, and perimeter gaps interrupt the top surface. Liquid may move along one of those paths before it is discovered.
Urine can also alter appearance as well as odor. A dark mark is not a reliable depth gauge. It may involve finish change, wood discoloration, reactions within the material, or earlier cleaner residue. A light mark may also represent finish damage rather than successful removal.
Repeated accidents in one location create a different problem from one promptly blotted event. The visible spot can be smaller than the affected edge or layer. Rewetting the center may temporarily change the odor while leaving the pathway at the joint untouched.
Nearby materials can confuse the diagnosis. A rug pad, baseboard, underlayment edge, felt furniture pad, pet bed, or cleaning cloth can retain the source and make the floor seem responsible. Remove and check one adjacent item at a time.
If the odor is room-wide or returns after different cleaning attempts, check nearby textiles, waste, tools, and airflow separately before treating the floor again. Keep the diagnosis local until evidence points to another source.
Finished Surface, Seams, and Bare Wood Need Different Decisions
Intact finished surface
When liquid was found quickly, the finish is known and unchanged, and odor stays at the surface, a controlled spot clean may be enough. The success test is simple: the floor reaches its normal dry state with no odor return, residue, or material change.
Worn or damaged finish
Wear exposes a less predictable pathway. If the area looks dull before cleaning, absorbs liquid faster than nearby boards, or changes under a damp cloth, stop treating it like an intact factory finish. The repair question may be larger than the cleaning question.
Plank seams and end joints
Seams deserve attention because liquid can travel where a cloth cannot. Do not pry boards apart, inject cleaner, or pack powder into a joint. These methods add material without showing where it goes or how it will be removed.
Dry the surface, document the joint, and monitor board shape. Persistent odor at a seam, raised edges, widening gaps, or movement underfoot supports a professional or property-management handoff.
Unfinished or exposed wood
Bare wood is porous. A urine-specific liquid may discolor it, drive residue deeper, or create a finish-adhesion problem later. DIY advice that calls for soaking, oxidizing, bleaching, or sanding skips the need to identify species, construction, stain system, and repair plan.
Protect the area from repeat exposure and seek qualified guidance. The solution might involve localized board work, a controlled professional treatment, replacement, or refinishing. It is not automatically sanding.
Engineered hardwood
Engineered hardwood has a real wood wear layer over a layered core. The thickness and construction determine what repair is possible. The NWFA notes that the number of times a floor can be sanded depends partly on wear-layer thickness, flatness, condition, equipment, and contractor skill.
Do not sand an engineered floor until the exact product and remaining wear layer are known. A stain that appears small on top can sit over a core that should not receive more moisture or abrasion.
Moisture Limits Matter More Than Cleaner Strength
Wood changes with moisture. The NWFA explains that moisture gain can contribute to cupping, while excessive dryness can contribute to gaps or splits. A urine cleanup should therefore remove liquid, not replace it with a larger volume of cleaning solution.
The same principle applies to rinsing. A product label may call for rinsing on one surface, but a wood-floor maker may prohibit that amount of water. The conflict means the product is a poor fit for the floor.
Watch the seams during and after cleaning. A darker joint immediately after wiping may simply be wet, but it should return to normal as directed. A joint that remains dark, swells, rises, or develops an odor after the surface dries needs assessment.
| Situation | Liquid limit | Product decision | Dry-state check |
|---|---|---|---|
| Fresh urine, known intact finish | Blot first; use only the minimal amount allowed by the floor guide | Manufacturer-approved hardwood cleaner, or a urine product approved by both label and floor maker | No odor, residue, color shift, or raised joint |
| Old odor, no visible mark | Do not wet the whole room to search | Identify the smallest zone and prior products before treating | Compare the marked zone after normal drying |
| Odor concentrated at one seam | Do not pour, inject, or soak the joint | Surface wipe only if still allowed; otherwise document and escalate | Joint remains flat, dry, stable, and odor-free |
| Worn finish or bare wood | Avoid ordinary liquid treatment until the material is assessed | Professional or manufacturer guidance | Repair plan defines when the area is complete |
| Unknown rental floor | Use no unapproved chemical or abrasive method | Ask property manager for floor identity and care instructions | Written record and unchanged surface |
| Cleaner already layered | Add nothing until compatibility and safety are clear | Follow product safety guidance; do not mix | No fumes or wet residue before any new decision |
What Not to Use as a Universal Hardwood Remedy
Vinegar appears in many home-cleaning recipes, but both Bruce and NWFA guidance warn that acidic cleaners can affect wood finishes. That does not require a claim that one drop always destroys every floor. It means vinegar is not a default urine treatment for unknown hardwood.
Hydrogen peroxide can lighten or alter wood and finish. Even a flooring article that mentions it for a stain may warn about color change. Do not leave a peroxide-soaked towel on a landlord-owned or unidentified floor based on a generic recipe.
Bleach is not a universal odor remover and can damage finishes. It also creates a serious mixing risk when combined with ammonia, acids, disinfectants, or other cleaners. The pet urine cleaning safety guide explains why product stacking is a separate hazard from floor compatibility.
Baking soda is not a depth repair. Powder can enter seams, remain as residue, or be difficult to remove from textured finish. A temporary reduction in smell does not show that urine beneath a joint has been removed.
Steam and wet mops add heat or water that major wood-floor care guides warn against. A carpet extractor is also not a hardwood urine tool unless both the equipment instructions and the exact floor documentation explicitly support that use.
An enzyme cleaner is a product class, not a wood-safety guarantee. Check the current label. If a label excludes untreated hardwood, requires saturation, or does not name your surface, choose a different method or seek advice.
Finally, do not sand, bleach, stain, wax, oil, coat, or replace a board as an odor experiment. Those are repair operations that need a compatible finish plan and, in a rental, owner authorization.
How to Recheck the Floor After It Dries
Use the same conditions for each comparison. Strong fragrance, an open window, or a running purifier can change what you notice. Return the room to a normal safe condition and inspect the marked area.
Look across the floor at a low angle. Compare sheen and board profile with the next unaffected row. Press a dry white cloth briefly against the surface; it should not pick up color, finish, powder, or tacky residue. Do not use this as a moisture meter or chemical test.
Check the center, seam, edge, and nearby removable material separately. Record where odor is strongest and whether it changes after the mat, bed, or furniture item returns. This small map is more useful than another room-wide treatment.
If the result is unclear, wait through the drying period specified by the product and floor maker. Do not extend waiting indefinitely when boards are swelling or a moisture problem is visible. Material change is a reason to escalate, not a reason to wait for a stronger smell.
When a Second Cleaning Attempt Makes Sense
A second attempt can be reasonable when the surface is confirmed finished hardwood, the first product and its residue are known, the floor is dry and unchanged, and you can identify one missed label step. Examples include treating too small an area, failing to remove residue as directed, or stopping before the approved dwell time.
State what will be different before starting. If the only change is “use more,” “leave it wetter,” or “add another cleaner,” do not proceed.
When the first attempt used a general wood cleaner and odor clearly remains on an intact surface, a urine-specific product might be considered only after compatibility is confirmed. Conversely, if a pet-odor product left residue, the floor maker’s approved cleanup method may be the next step. Do not alternate products without resolving label compatibility.
When to Call the Landlord, Manufacturer, or a Wood-Floor Professional
Renters should report an accident when the floor is changing, the source may be below the finish, or the approved care method is unknown. Send clear photos, the location, date discovered, products already used, and current dry-state observations. Early documentation gives the owner a chance to identify the flooring and protect a larger area.
Contact the flooring or finish manufacturer when you know the product but the maintenance guide does not address a urine-specific cleaner. Ask whether the named cleaner, contact time, and residue-removal method are compatible.
A wood-floor professional becomes the right contact for persistent seam odor, exposed wood, deep discoloration, cupping, raised edges, loose boards, damaged finish, or a proposed sanding/refinishing decision. The NWFA distinguishes a maintenance coat from a complete sand and refinish and notes that deeper damage and exposed wood may require more extensive work.
| Sign | What it may mean | Appropriate handoff | Avoid |
|---|---|---|---|
| Odor returns from the same joint after full drying | Source may be below the surface finish | Property manager or qualified wood-floor professional | Injecting cleaner into the joint |
| Finish turns dull, white, sticky, soft, or uneven | Urine or cleaner may have altered the coating | Flooring/finish manufacturer or professional | More rubbing, solvent, polish, or another chemical |
| Board edges rise or the floor cups | Moisture condition may extend beyond surface residue | Property manager or wood-floor professional promptly | Adding water or concentrated heat |
| Dark stain remains on exposed wood | Material discoloration or penetration may require repair | Qualified refinisher or inspector | Spot sanding or household bleach |
| Engineered wear layer is unknown | Sanding capacity cannot be assumed | Manufacturer or qualified professional | Renting a sander and guessing |
| Strong fumes or irritation occur | Products may be incompatible or misused | Fresh air and poison-control/emergency guidance as appropriate | Trying to neutralize the mixture |
| Repeat accidents continue | Cleanup and recurrence are separate issues | Veterinarian for new or concerning elimination changes; appropriate pet-care resource for behavior | Turning a health or behavior issue into repeated chemical cleaning |
Sanding is therefore one possible professional repair, not the inevitable next step for every lingering odor. Local board replacement, finish repair, or another controlled intervention may fit the construction better.
Reduce the Chance of Another Hardwood Odor Problem
Place a washable, colorfast, breathable protective layer only where the floor maker allows it. Avoid backings that trap moisture or discolor the finish. Lift and check the protector routinely rather than letting it hide a slow leak.
Keep an absorbent cleanup kit nearby: plain white cloths, disposable towels, gloves if needed, a waste bag, and the floor’s approved cleaner. Store chemicals closed and away from pets. Faster access matters more than a shelf full of competing products.
Check high-risk edges such as the side of a litter box, an indoor potty zone, a pet bed beside a wall, and the seam under a feeding mat. The goal is early discovery. This page does not address why a pet urinates indoors.
For whole-apartment floor routines involving dry debris, hair, entry soil, and surface-specific wet cleaning, use how to keep floors clean with pets. The hardwood urine workflow here should remain a contained exception within that broader routine.
Final Takeaway
The safe way to remove pet urine odor from hardwood is to protect the finish while determining whether the source is still on top of it. Blot fresh liquid, identify the real floor and finish, use one mutually compatible product with minimal moisture, dry promptly, and reassess at a normal dry state.
Persistent odor at a seam, worn finish, exposed wood, discoloration, or changing board shape is no longer a routine surface-cleaning problem. Document it and move to the manufacturer, property manager, or a qualified wood-floor professional before added liquid or abrasion creates a larger repair.
Sources
- National Wood Flooring Association: How to Clean and Take Care of Your Wood Floors
- National Wood Flooring Association: Wood Floor Finishes
- National Wood Flooring Association: Refinishing Your Floors
- National Wood Flooring Association: Problem Prevention and Moisture Management
- Bruce Flooring: Hardwood Floor Care Tips
- Shaw Floors: Hardwood Care and Maintenance
- CDC: When and How to Clean and Disinfect Your Home